What does Spatial Mic USB sound like? That’s a question we’ve been asked a lot lately. As it turns out, we’ve been putting Spatial Mic USB through its paces both in the studio and field and are excited to share the results. In this guide, we will listen to the multi-instrumentalist DJ Brennan in a recording studio as well as a collection of concert and field recordings.
First, grab a pair of headphones so you can closely listen to the binaurally decoded ambisonic recordings. Next, we’ll explore the best way to listen and explore the audio, including a full Reaper session for download. Finally, the recording process and setup will be explained so you can understand exactly what you are listening to.
Listening to Spatial Mic USB
We have made available two ways to demo these sound samples from Spatial Mic USB. The easiest way is to simply hit the play button on the SoundCloud player below. The clips have been encoded using Spatial Mic Converter and many of them then decoded for stereo playback.
If your interest lies in live concert recording, be sure to check out our article on recording Dreamers’ Circus, where you will find a Reaper and Pro Tools session with the raw recording from the first sound-clip above.
If you’d like to explore what is possible with Spatial Mic and ambisonics in general, as well as compare Spatial Mic against a popular 1st order microphone, we recommend downloading the Reaper Session below, along with a few plugins that can help you manipulate higher order ambisonic audio.
The session contains a collection of field and studio recordings, many of which were simultaneously recorded with two Spatial mics for a close and room sound.
Setup & Control The Reaper Session
- Download and install the 64-bit version of Reaper (free trial).
- Download the following Reaper Session containing clips recorded directly from Spatial Mic:
- Download and install the following free plugins used in the Reaper session.
Now that we have some tools to work with ambisonics, go ahead and open the session. The first thing you will see, if you have installed the O3A Core plugin suite, is a window for Flare. This plugin helps you visualize sound in a 3D space. Go ahead and unmute the green GTR Close track and press the spacebar to start playback. You will now see ambisonic audio visualized in Flare, with the colored region closer to ‘Above’ representing the vocals and the region slightly below ‘Front’ and towards ‘Left’ representing the acoustic guitar:

Visualizing the recordings can be very helpful when adjusting the location of sound. For example, we can open the Spatial Mic Converter plugin and adjust the location of the vocal and guitar in the 3D sound field. Notice how when we rotate the direction of the microphone in Spatial Mic Converter, the sound field visualization also rotates in Flare.

The sound should also be rotating in your headphones. If for some reason it is not, the first thing to check is that the ambisonics to binaural decoder is setup correctly. Click on the FB360 Converter plugin located on the MASTER track and verify that it is setup as follows.
 Now you can navigate the Reaper demo session by un-muting and muting the tracks you wish to audition and at the same time visualize and manipulate the orientation of your sound scene.
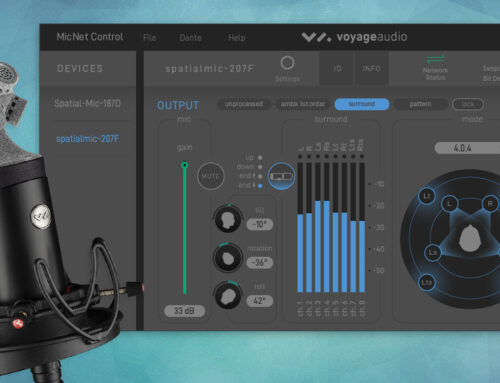
Virtual Mic Output
The Spatial Mic Converter also features a stereo virtual mic output. Before you explore this feature, make sure you disable the FB360 binaural converter, since the plugin output will now be traditional Left/Right stereo. Now you can use the virtual mic output of the Spatial Mic Converter plugin to decode complex polar patterns and then aim them around in 360°.

There are 15 presets available to explore what you can do with this virtual mic output.
If you’d like to dive deeper into the controls and also learn more about In-Phase, Basic, max rE and Figure 8 patterns, check out this article on the Spatial Mic Converter plugin.
You can send the virtual mic output to third party plugins such as EQ and compression to further refine your sound — just like you would a mono or stereo microphone. This feature makes it incredibly easy to incorporate Spatial Mic into traditional recording sessions!
Next, let’s take a closer look at the different tracks available in this session and on SoundCloud for a better understanding of what exactly we are listening to and how it was recorded.
Studio Recording Process
The majority of the sound clips in this session were recorded at Signature Sound in San Diego, California with multi-instrumentalist DJ Brennan. The studio features a large tracking room with nice acoustics for recording live musicians.
Most of the studio recordings in the demo session features two ambisonic microphones recorded simultaneously via USB into a laptop computer. For example, the GTR Close and GTR Room tracks feature one Spatial Microphone close to the guitar (and vocals) as well as one microphone placed further away from the musician in the room. In the following photo, you can see where the microphone was positioned for the GTR Close track. The GTR Room mic was positioned about 5 feet further away from the musician.

We decided to record a Sennheiser Ambeo first order ambisonic microphone and a Spatial Mic at the same time in the room in front of the musician. This was done by plugging the Ambeo into 4 analog channels on a Focusrite Clarett 8pre and the Spatial Mic into the ADAT input on the same interface. Here is a photo of the two microphones in front of the musician during the recording.

Looking now at the Violin recordings, we again see a close mic and a room mic. The VLN Close track was recorded as shown in the following photo. The VLN Room mic was recorded about 12 feet away towards the middle of the room.

Next we have the Piano tracks. The Yamaha Grand Piano was again recorded with a close microphone and a room microphone. The close microphone was positioned as shown in the photo below, with the room mic about 5 feet towards the middle of the room.

We again recorded the Sennheiser Ambeo along side the Voyage Audio Spatial Mic in the room in front of the piano simultaneously with the Focusrite Clarett 8pre.

Field Recording Process
Looking now at the ‘Field Recording’ section of the Reaper demo session, we find various recordings taken outside of a traditional studio setting. Most of these recordings were done by connecting Spatial Mic to an iPhone 5S, as outlined in the Spatial Mic User Manual. The highly portable setup features an Insta360 OneX for simultaneous 360 video recording. Once at location we can start recording audio and video in about 1 minute. Our field recording setup looks like this:
 The field recording tracks in the Reaper demo session are as follows. A 360 video is available on YouTube (1st Order) and Facebook360 (2nd Order):
- Marimba recorded outside in Downtown Madison Wisconsin by Craig Eley of the Field Noise podcast.
- A recording taken during a stroll down the Venice Beach Boardwalk.

- A track recording electric guitar routed from a Strymon TimeLine delay effects pedal into two amps. The microphone gain was set to ‘pad mode’ and the mic itself was placed between the two amplifiers. No additional effects were added.

- The train recording was captured as a train came into Santa Fe Station in Downtown San Diego, California.

- Finally, we went down to the ocean to record some waves hitting the cliffs. Here is a photo of the ocean spray you hear in this field recording.

Going Further
As you can see, Spatial Mic can produce great results both in the studio and field. There are many free tools available to further explore what can be done with ambisonic recordings.
A great free plugin suite dealing with ambisonics is the IEM Plug-in Suite. We highly recommend beginning your experimentation with this plugin suite by using their FDN reverb, which can bring some further life to ambisonic recordings. Try placing this reverb directly after Spatial Mic Converter!
SSA Plugins has a very nice suite of plugins available as a Free 30 Day trial. This suite deals exclusively with ambisonic audio and offers a great EQ, Compressor, DeEsser, Gate, Delay and more. These are essential tools to quickly and easily work with higher order ambisonics. Here you can see SSA Compressor taming dynamics directly after the Spatial Mic Converter plugin.

We hope you enjoyed listening and experimenting with these audio files. In the future, we are excited to bring even more sound samples with increasingly complex sound fields. Stay tuned for more and please reach out to us if you have any requests or suggestions regarding what you’d like to hear. In the meantime, take a look at our SoundCloud and YouTube channels for more content and don’t forget to check out the Voyage Audio Spatial Mic — available now!