Impulse Response Creation With Spatial Mic
If you have ever wanted a recording to sound like it was captured somewhere else, an impulse response can help. Put simply, an impulse response, or IR for short, describes how a system responds to external stimulus.
For example, a reverberant concert hall (system) IR could be captured. Then a voice (stimulus) could be recorded at a different time in a non-reverberant setting. The IR from the concert hall could then be used to simulate how the voice would sound in that environment.
With an IR capture of an acoustic space, it is possible to use this IR in a convolution reverb to simulate the location and apply it to unfiltered audio. This can give the illusion of the unfiltered audio occurring in the acoustic environment from which the IR was captured.
In this article we will touch on two Impulse Response creation methods – the transients method (i.e. balloon pop, starter pistol or firework method) and the swept sine method. Note that one important distinction is that with the transients method, the resulting file can directly be used in a convolution reverb while the swept sine method requires additional processing.

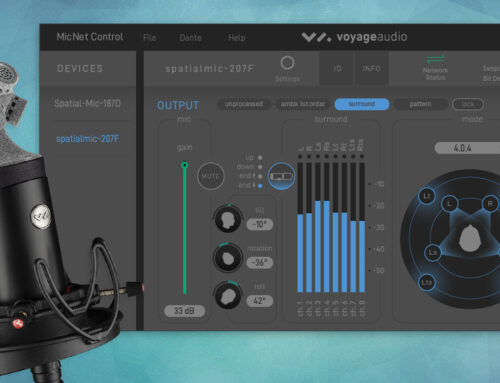
The 8 Capsule Spatial Mic Array
Capture IRs For Spatial Audio
Since Spatial Mic Dante & USB record the entire 3-dimensional soundfield, the response of an acoustic space may be realistically captured.
This capture can then be used in convolution reverb plugins, game engines and other audio DSP to simulate this space. The output may be ambisonic, surround sound (5.1, ATMOS, etc) or mono / stereo depending on how the output of the Spatial Mic Converter plugin is set. The final IR is rendered from the output of the Spatial Mic Converter plugin.
If you would like to learn more about ambisonics, check out our Ambisonics Demystified article. For those that are curious to learn more about technical aspects of ambisonic microphones you can check out our Spatial Mic Technical Guide.
Unreal Engine IR Creation With Transient Method
While there are different ways to capture IRs, sound designer and audio engineer David Woje uses the transients method via balloon pops in his tutorial along with Spatial Mic USB. Take a look below and then we’ll get into how he uses IRs in Unreal Engine for game sound design:
Now let’s explore the steps taken in the above video.
-
- Capture response using the balloon popping method transient method.
- Edit the impulse capture in a DAW like Pro Tools or Reaper so that the sound file only contains the audio of interest.
- Render this audio from the output of the Spatial Mic Converter plugin set to 4 channel First Order Ambisonics (FOA) to a new file.
- Import this render into Unreal Engine
- Right click on the file and then Create Impulse Response
- Right click the content browser, create a new submix and then name it
- Assign this IR to the submix
- Select Convolution Reverb
- Assign submix to the main mix
- Adjust the wet and dry levels in the submix to taste.
IR Creation For Use In A DAW
Convolution reverb plugins can often load custom IRs. Many however are not yet suited for ambisonic type recordings. The plugins we know about that can handle multichannel IRs are the following:
-
- Noise Makers Ambi Verb HD: https://www.noisemakers.fr/ambi-verb-hd/
- Angelo Farinas X-MCFX: http://www.angelofarina.it/X-MCFX.htm?fbclid=IwAR3-uptvlPxhpjVH55JWRiCBc3GQoAgZbx-RRjCUMYAuBAD-PQV1VeoDnCI
It may be possible to use the transient method above for direct impulse response creation. In this case the steps are:
-
- Capture impulse using transient method and Spatial Mic USB or Dante
- Trim audio to only the region of interest.
- Render audio through Spatial Mic Converter Plugin with the output stage set to the final target – this could be 1st or 2nd order ambisonics or even stereo.
- Load the result into your convolution reverb of choice.
The trade offs when using the transients method is simplicity versus loss of high and low frequency information, as well as the possibility of clipping with loud transients. If you choose to create IRs using the state of the art swept sine method please read on. In this way, the frequency bandwidth and Signal To Noise ratio may be optimized.
After the responses have been captured from a swept sine played back over a loudspeaker (instead of a balloon pop), they will need to be post processed to create the actual IR before loaded into the convolution reverb plugins.
Through this process you need the swept sine and the recorded response from this swept sine. You will then “deconvolve” these two signals to create the IR of the target acoustic space or system.
Several tools exist for can be created for this:
-
- Apple Impulse Response utility: https://manuals.info.apple.com/MANUALS/1000/MA1655/en_US/impulse_response_utility.pdf . Also check out how to convert the SDIR files to .wav: https://digital.eca.ed.ac.uk/sounddesignmedia/2018/11/13/converting-sdir-files-to-more-universally-useful-wav-files/
- Voxengo Deconvolver: https://www.voxengo.com/product/deconvolver/
- Custom Octave, Matlab or Python scripts can be constructed to read in files, deconvolve and then write the final impulse responses.
- CATT GratisVolver™: http://www.catt.se/
Conclusion
While ambisonic IR creation can be a somewhat technical process, once a workflow is established the creation may not take long at all. Resultant IRs can transform your productions and sometimes serve as the creative spark that ignites an entire piece.
Capturing IRs is just one of many useful applications with Spatial Mic.
Learn more about Spatial Mic:
https://voyage.audio/spatialmic
Where to buy Spatial Mic Dante:
https://voyage.audio/where-to-buy