Let’s explore how to sync 2nd order ambisonic audio recorded using Spatial Mic with 360 VR video for delivery on Facebook 360, YouTube 360 and Oculus Quest headsets. This process will be helpful regardless of gear used for capture. Here is the simple 360 video with embedded spatial audio we will be creating — notice as you use your mouse to click and drag around the video how the spatial audio changes to reflect the new viewing position:
To help with understanding how to sync the audio and video for head-tracking, download the Reaper session used to create this video:
Download 360 VR Audio Video Reaper Session.zip (483MB)
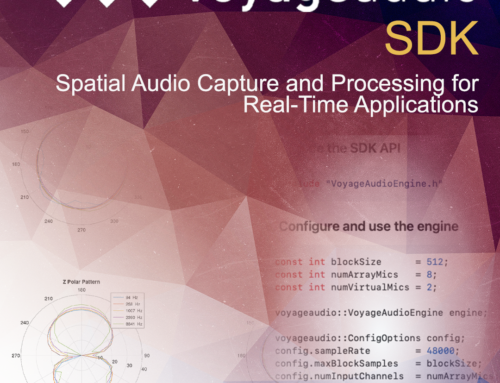
You’ll also need the VST audio plugins used in the above session to process and encode the ambisonic spatial audio:
Now follow along with the Reaper session and learn how to sync spatial audio with 360 VR video.
Part 1: Record & Export 360 Audio & Video
Video:
In this tutorial we will be using video captured with an Insta360 OneX. Regardless of your 360 VR video source, whether it is a single clip, compilation of many clips or completely custom video, we recommend exporting 2 seperate versions as follows:
- Full resolution .mp4 with no embedded audio. This is the version we will “inject” our 360 spatial audio with. At the end of this tutorial, this is the version that will ultimately get uploaded to YouTube 360, Facebook 360 and Oculus Quest headsets. Here are the settings we use when working with Insta360 OneX video:
5760×2880, 29.97 fps, Progressive, VBR, 1 pass, Target 150 Mbps, Max 240 Mbps, no audio. - Lower resolution .mov to use in Reaper with the embedded stereo audio track. We won’t end up using the stereo audio track, but it will help to align the spatial audio. We make a low res version so that we can quickly edit and use whatever audio plugins we wish in Reaper. For this we use the following settings:
1080×540, 29.97 fps, Progressive, Quality 100, Apple ProRes 422 LT
Audio:
Spatial Mic can be used to record 8 channels of audio to a mobile device. For this video, we connected Spatial Mic to an iPhone using the setup shown over in our 360 Field Recording With Spatial Mic journal article and launched the Multitrack DAW app and recorded concurrently with the 360 video. After recording, the 4 Stereo audio tracks (8 tracks total) from the Multitrack DAW app were exported and brought into Reaper, where we then rendered it to the 8 channel audio file present in the downloadable reaper session for this tutorial. Rendering the 4 stereo audio tracks to an 8 channel track is an extra step that doesn’t necessarily need to be done, however for our purposes it will aid in keeping the channel ordering correct, which is essential for proper Spatial Audio.
Part 2: Use Reaper To Sync Audio & Video
Now that we have our audio and video prepared, we need to combine the two in a way that will allow the final 360 VR video to be headtracked on our target platforms. To do this we must encode the audio to ambisonics.
- Open the Reaper 360 Audio Video Tutorial project linked above.
- Click on the FB360 Spatialiser plugin located on Track 2. Load the included ‘360 Sea Cove – Reaper Export.mov’ file. Your session should now look like this:

- The audio and video in this session should already be in sync. To aid in alignment without the use of third party tools, you may drag the ‘360 Sea Cove – Reaper Export.mov’ file onto Track 2 in the Reaper Edit window. This will bring the stereo audio into Reaper. You can use this stereo audio to align the spatial audio as shown:

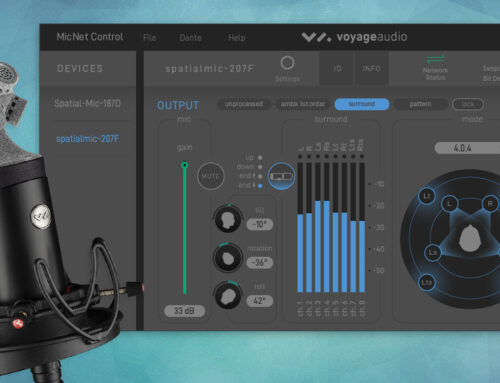
- Now open Spatial Mic Converter and adjust the rotation to help align to the video direction and enhance audio. In this case we point slightly down, enable the High Pass Filter and boost the audio by 10dB:

- Listen to the audio while moving the 360 video viewport around with your mouse to confirm everything sounds and changes with direction properly. Monitor using the FB360 Mix Loudness plugin to ensure no audio is clipping. If audio clipping occurs, turn the track down or consider using an ambisonics limiter like Ambi-Limiter HD to catch the peaks.
- Note that the Spatial Mic Converter plugin outputs 9 channels for 2nd Order Ambisonics. We have inserted the FB360 Converter plugin after this to convert from 2nd to 3rd order ambisonics. In practice this is simply dropping the higher order channels and is inserted here for completeness to show how to mix this output with other tracks spatialized for 3rd Order. There are other ways to upmix from 2nd to 3rd order such as a parametric approach like Sparta Compass Upmixer, or a linear approach using Sparta AmbiDEC to convert from 2nd Order to T-design (24) followed by Sparta AmbiENC to convert from T-design (24) to 3rd Order.
- At this point if there were other sounds recorded along with Spatial Mic, they could be assigned to objects in the video using the FB360 Spatialiser plugin. The different recordings may then be mixed with effects applied as deemed appropriate.
- Once you are satisfied with the audio quality, open the FB360 Control plugin located on the Master track and turn off Decode Binaural. You may need to scroll down to see this setting.

- Open File>Render, change the settings to match the screenshot below and then render one, 16-channel . wav file. Note that ‘16’ must be physically typed into the Channels option.


Part 3: Use FB360 Encoder To Combine Spatial Audio & Full Resolution 360 Video
- Launch the FB360 Encoder standalone application that was installed alongside the VST plugins. Drop or Load the audio file we rendered in the last step above, along with the full resolution video as shown.

- Change the Output Format to whichever platform you want to target and then click Encode. This encoded output file can now be uploaded to the corresponding platform it was created for. Spatial audio will automatically be detected after the video is finished processing on the platform of choice.
- If you are targeting an Oculus headset, try using the FB360 Matroska setting and then upload to the headset via USB for viewing in the Oculus Gallery app. Different video players react differently depending on the type of file — you may need to experiment.

Once we uploaded the video to Youtube and waited for it to finish processing we are left with this:
We hope this tutorial was helpful in learning how to sync spatial audio with 360 VR video. If you have any trouble, please leave a comment on the YouTube video above!