Spatial Mic is a 2nd order ambisonic microphone that outputs eight channels of audio over USB and ADAT light pipe. One channel of audio for each capsule in the microphone. Depending on which application you are recording with you may only have the option of recording to mono or stereo tracks. For example, when recording Spatial Mic with an iPhone using MultiTrack DAW you will record four stereo tracks in this configuration:

You can use the stereo files in your DAW and route them to the Spatial Mic Converter plugin or you can optimize your workflow by combining these audio files into a single multichannel audio file also known as a polyphonic WAV file. In this tutorial we will go through the steps of importing your audio files and creating an eight channel polyphonic WAV file from four stereo audio files using Reaper. You can download the audio files we are using in this tutorial and follow along. We also made a Reaper template with the tracks and routing already set up so you can import your audio and skip ahead to step 5 to start creating polyphonic WAV files.
If you don’t already have Reaper you can download a free trial at https://www.reaper.fm/download.php
Launch Reaper
Step 1: Go to Track > Insert New Track (Ctrl+T or Cmd+T on Mac) Do this 5 times to create 5 tracks.

Step 2: Double click in the box next to the record enable button and name each track. Name the first track for the new polyphonic WAV file we will create and name the subsequent four tracks for the stereo files will import in the next step. We suggest using names that will help make the routing easier such as the names seen below.

Step 3: Import the audio files by selecting and dragging them into your project or by going to Insert > Media File…

Select the audio files and click Open.

When the notification window pops up, select the Separate Tracks option.

Place the audio files on the corresponding tracks as seen below.

Step 4: With the files placed on the appropriate tracks we need to route all of the audio to the polyphonic wav track. On track CH12 click on the routing button to open the routing options window. Uncheck the Master send option. Create a new send by clicking on the Add New Send drop down and select the Polyphonic WAV track. Confirm that the audio channels are routed from 1/2 to 1/2, then close the routing window.

Open the routing window for the subsequent track named CH34. Uncheck the Master send option. Create a new send by clicking on the Add New Send drop down and select the Polyphonic WAV track. The audio channels 1/2 from this track must be routed to channels 3/4 on Polyphonic WAV track. To do this select the drop down shown below and choose New channels on the receiving track > 3/4.

Repeat these steps for the remaining two tracks, routing the audio to the corresponding new channels on the Polyphonic Wav track (track CH56 to Polyphonic 5/6, and track CH78 to Polyphonic 7/8). When the routing is complete you can press the play button to see the eight meters moving on the Polyphonic Wav track indicating it is receiving audio from all eight channels.

Step 5: Right click on the Polyphonic Wav track and select Render/freeze tracks > Render tracks to multichannel stem tracks (and mute originals).

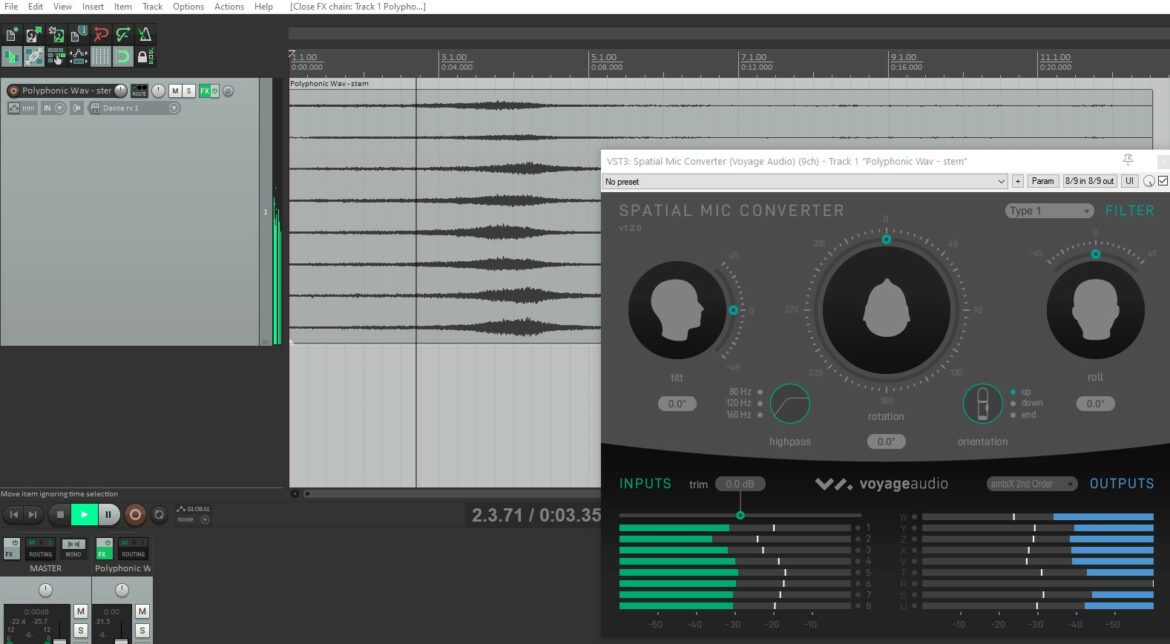
You now have an eight channel polyphonic wav file. You can remove the stereo audio files and all of the unused tracks to clean up your session. The audio files we used in this tutorial are raw audio files from a Spatial Mic recording. You can add the Spatial Mic Converter plugin to the Polyphonic Wav track and put a binaural decoder like the SSA Monitor to listen to this audio file. You can learn more about the 2nd Order Ambisonics Spatial Mic on the Voyage Audio website and listen to more samples in the journal article ‘Listening to Spatial Mic‘.


